Setting up the integration
Generate Registration token
If anywhere throughout this document, you have to provide a registration token, here are the steps to obtain it:
- Log in to the Acronis Cyber Protection console.
- Click Add Device and scroll down to Registration token. Then click GENERATE.
- Select a token with a maximum lifetime value and click GENERATE TOKEN.
- Copy the token you just generated.
Generate Client App ID
- Log into NinjaOne.
- Go to Administration > Apps > API > Client App IDs in NinjaOne.
-
Create a new API token with below settings:
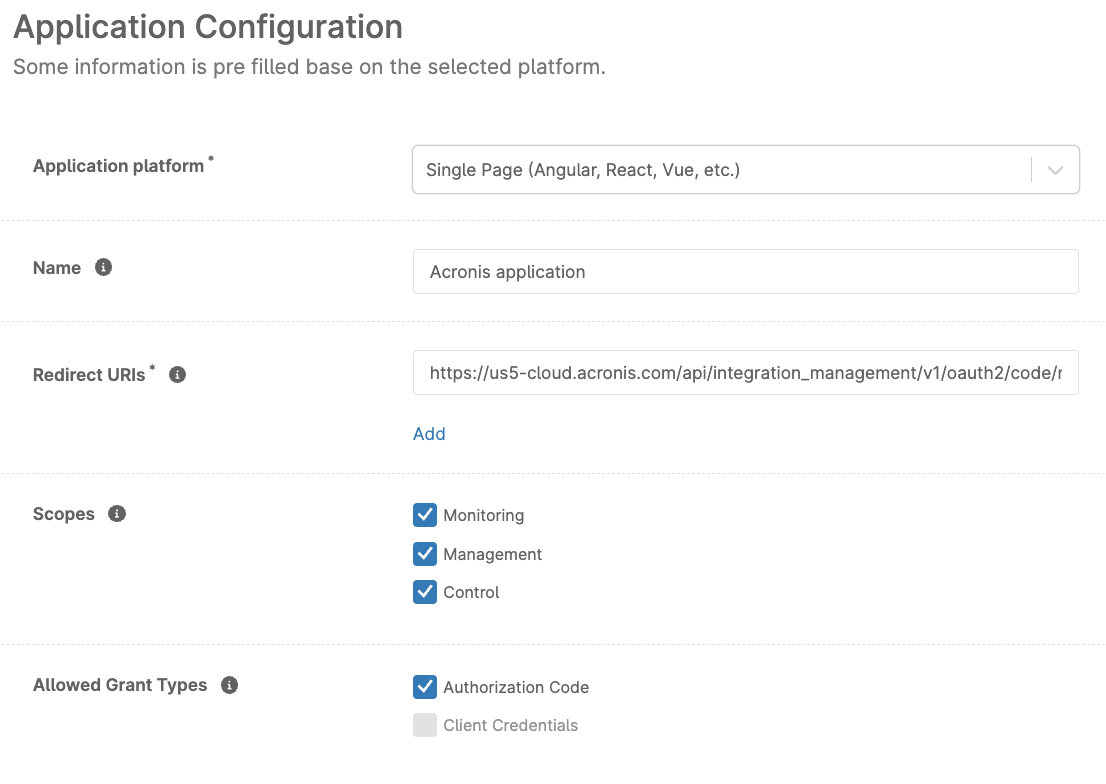
- Application platform - select Single Page from the drop-down
- Name - enter your label, for example: Acronis application
- Redirect URLs - provide the corresponding redirect address: https://<acronis_url>/api/integration_management/v1/oauth2/code/ninja, where
<acronis_url>is your Acronis Cyber Protect Cloud console URL.
Example of a valid redirect url for us5 data center: https://us5-cloud.acronis.com/api/integration_management/v1/oauth2/code/ninja - For Scopes, enable the following options:
- Monitoring
- Management
- Control
- For Allowed Grant Types, enable Authorization Code and save.
- Enable Refresh token and save.
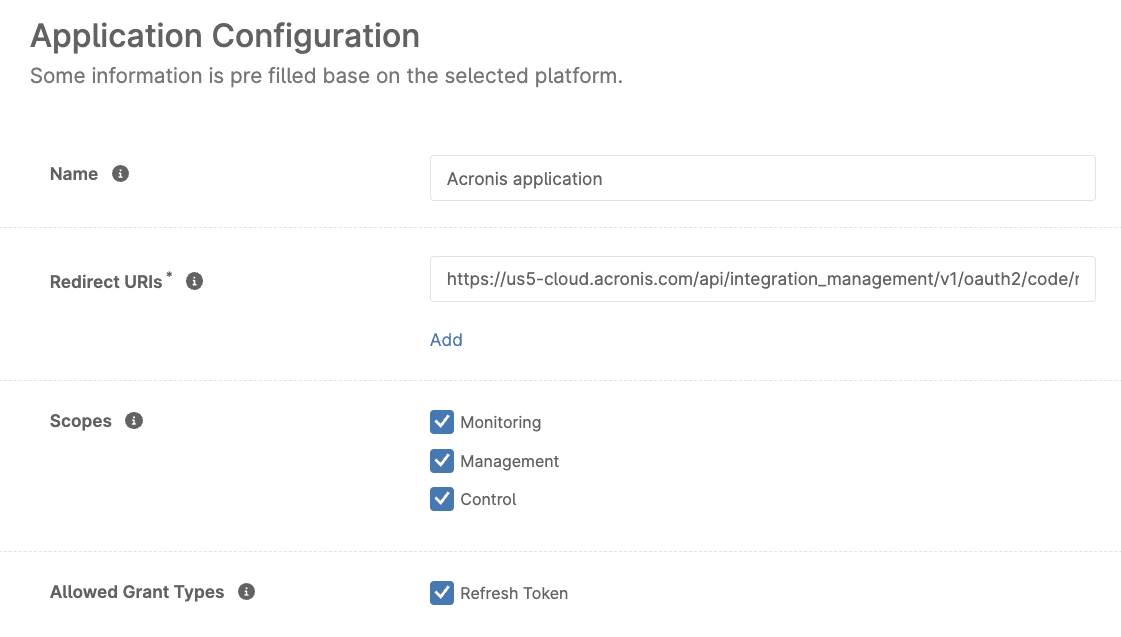 If this option is not available to configure in the Application configuration form, save it, find it in the list and click Edit. Then enable Refresh token and save again.
- Copy Client ID for the created API token to use when configuring integration in the Acronis Cyber Protection console.
Setting up the integration in Acronis Management portal
Enable integration
To set up the Acronis integration for NinjaOne:
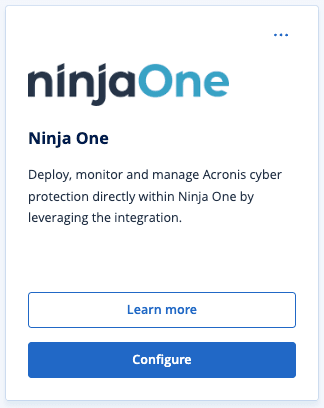
- Go to the Acronis Management portal > Integrations.
- Click Configure on the NinjaOne tile:
See more information about enabling and managing integrations.
-
Provide credentials to your NinjaOne account.
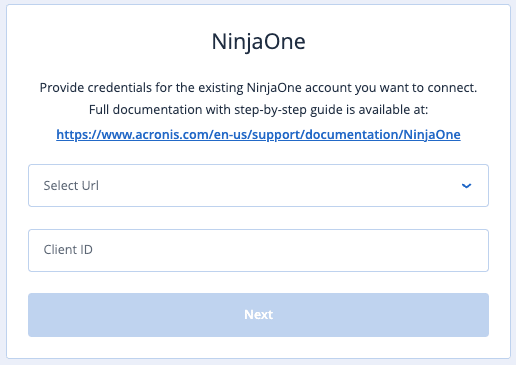
- If the datacenter you want to connect to does not appear in the drop-down menu and its address ends in ".ninjarmm.com", you can enter it manually. You can enter the address of any other DC with URL ending in ".ninjarmm.com".
- See how to generate Client App ID in NinjaOne.
If you have provided correct credentials, you will be prompted to authorize Acronis to get API access to NinjaOne account:
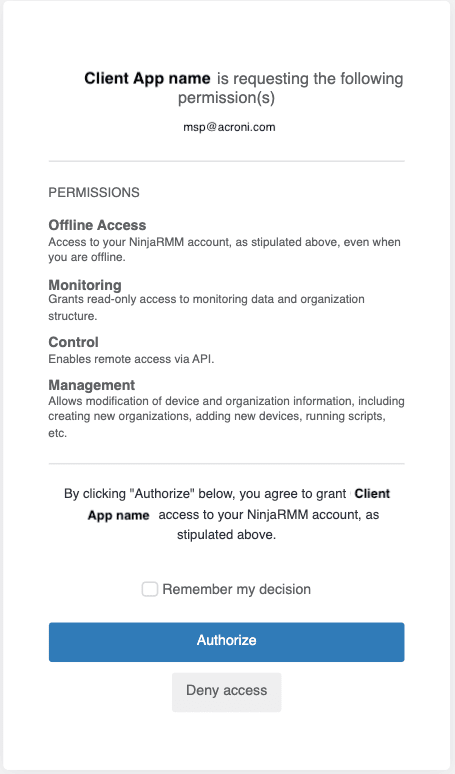
- If the datacenter you want to connect to does not appear in the drop-down menu and its address ends in ".ninjarmm.com", you can enter it manually.
- Click Authorize to proceed.
I you have provided correct credentials, you will be redirected to Integration settings.
Configure integration settings
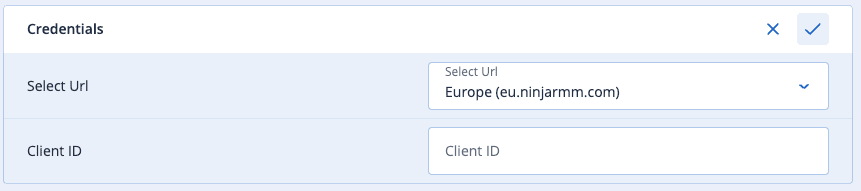
- On the Integration settings tab, you can update Credentials.
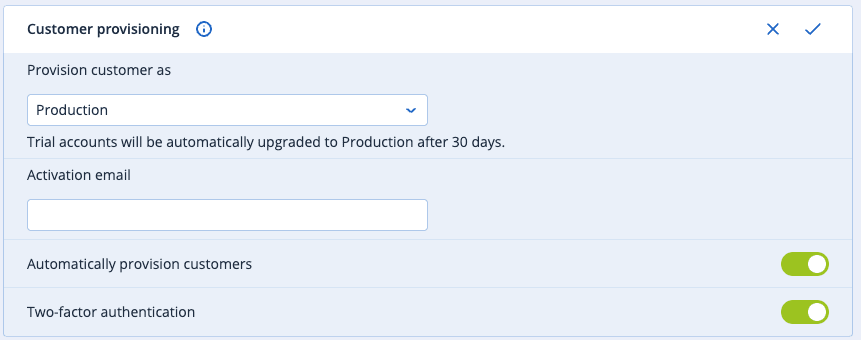
- In the Customer provisioning section, configure the parameters required to create new customers in Acronis Cyber Protect Cloud:
- In the Provision customer as drop-down, select the mode of customer creation - Production or Trial.
- Provide Activation email - the address of the administrator user, which will be created for the new customer, where the user activation link will be sent.
- Switch the Automatically provision customers toggle button to enable or disable all customers newly registered in NinjaOne to be automatically created in Acronis Cyber Protect Cloud.Make sure that you have mapped NinjaOne organizations, which are already registered as Acronis customer tenants. Otherwise, these customers will be duplicated after enabling automatic customer provisioning.
- Switch the Two-factor authentication toggle button to enable or disable the corresponding option for new customers.
-
In Customer deprovisioning, set the following options:
-
Select the Disable the customer checkbox to disable the Acronis customer if the organization is deleted in NinjaOne.
-
Mark the Delete the customer checkbox to delete the customer tenant and all related data in the specified number of days after it was disabled.

-
-
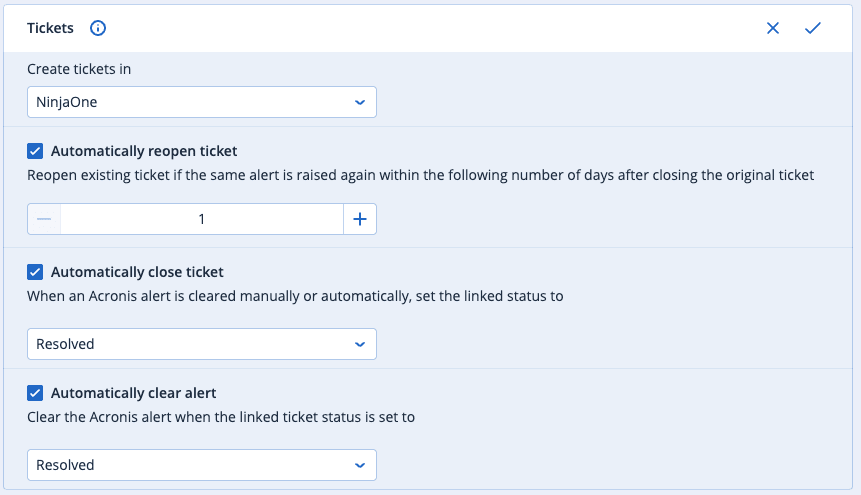
In the Tickets section:
-
From the Create tickets in drop-down list, select the ticketing system to enable automatic tickets creation based on Acronis alerts: NinjaOne, Advanced Automation (available if the corresponding service is activated) or disable the ticketing creation option.
-
Enable the Automatically reopen ticket option to reopen existing tickets if the same alert is raised again within the specified number of days after closing the original ticket.
-
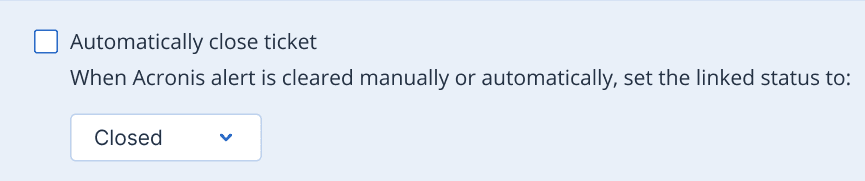
Enable the Automatically close ticket option, so that when an Acronis alert is cleared either manually or automatically, the linked status will be set to the value, selected from the drop-down list.
-
Enable the Automatically clear alert option to clear Acronis alerts when the linked ticket status is set to the value, selected from the drop-down list.
-
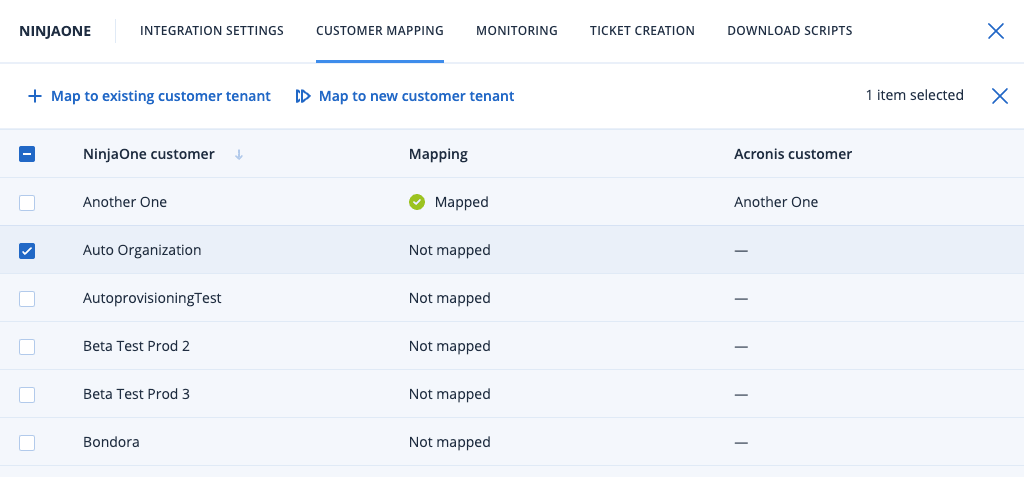
Apply customer mapping
Mapping NinjaOne organizations to Acronis customer tenants is necessary for the integration to link those entities and to be able to perform automatic synchronization of monitoring statuses and alerts.
-
Go to the Customer mapping tab.
-
Using customer mapping, you can manually provision RMM customers to Acronis or map them to existing customers:
-
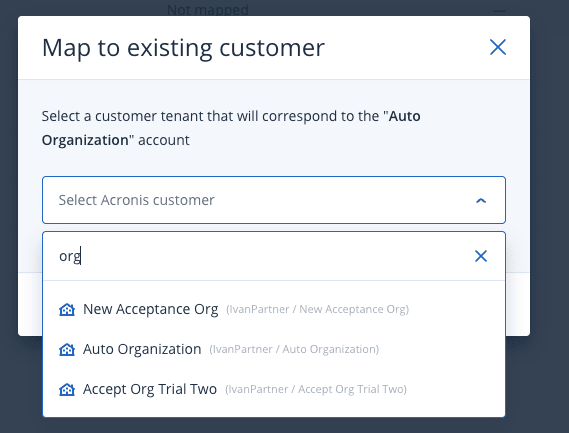
Select NinjaOne customer from the list and click Map to existing customer tenant.
-
Select Acronis customer and save.
-
Select NinjaOne customer(s) and click Map to new customer tenant to create the corresponding new customer in Acronis and map them.
-
As a result, a new customer will be created in Acronis, based on the parameters, defined in Integration settings in Customer provisioning section.
Configure monitoring
As long as the integration has been enabled and customer mapping is done already, you can proceed with mapping Acronis statuses to NinjaOne custom fields.
To do that:
- Go to Acronis Management portal > Integrations > NinjaOne > Configure > Monitoring tab.
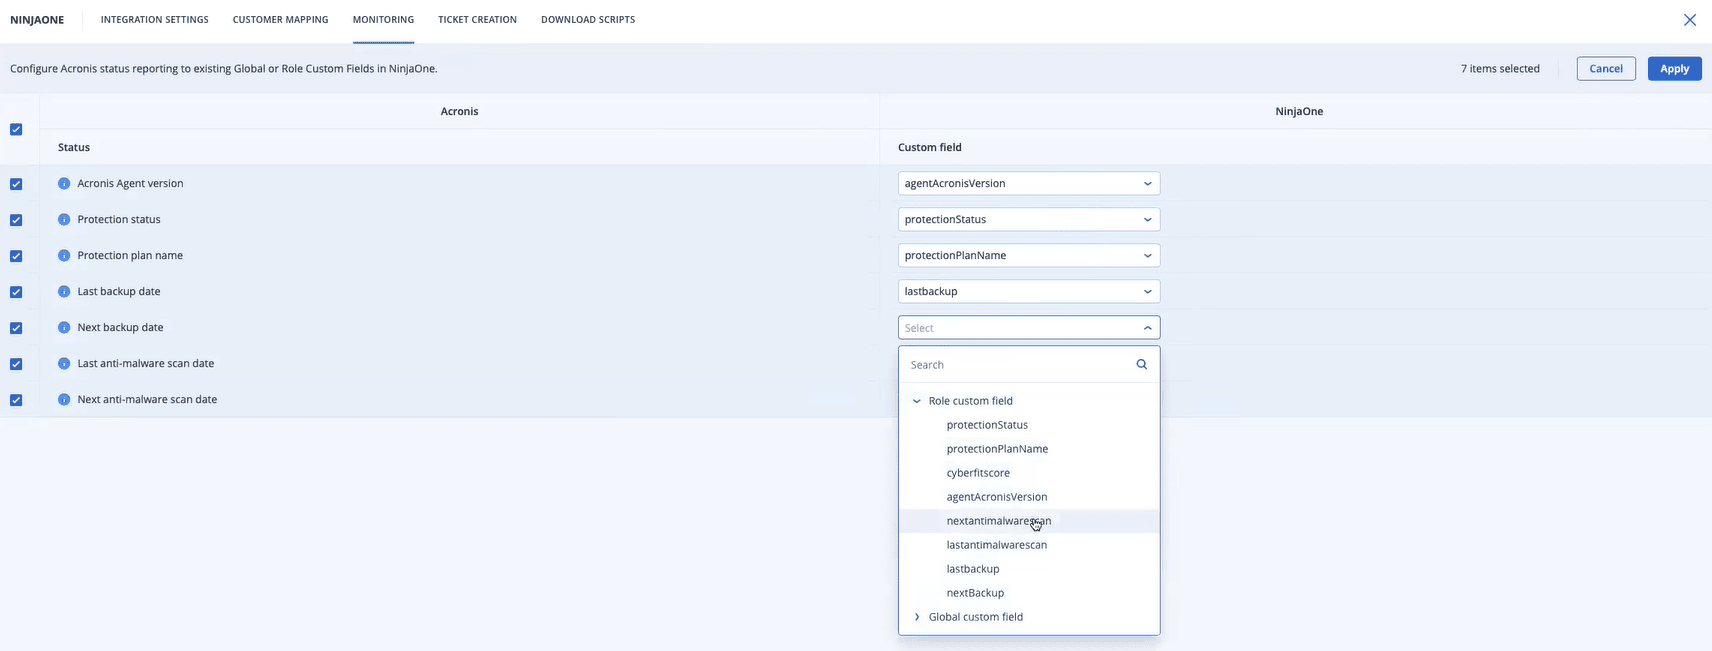
- Here you can see an up-to-date list of monitoring statuses and existing custom fields of Role or Global type in the NinjaOne account. Select statuses that have to be monitored in NinjaOne.
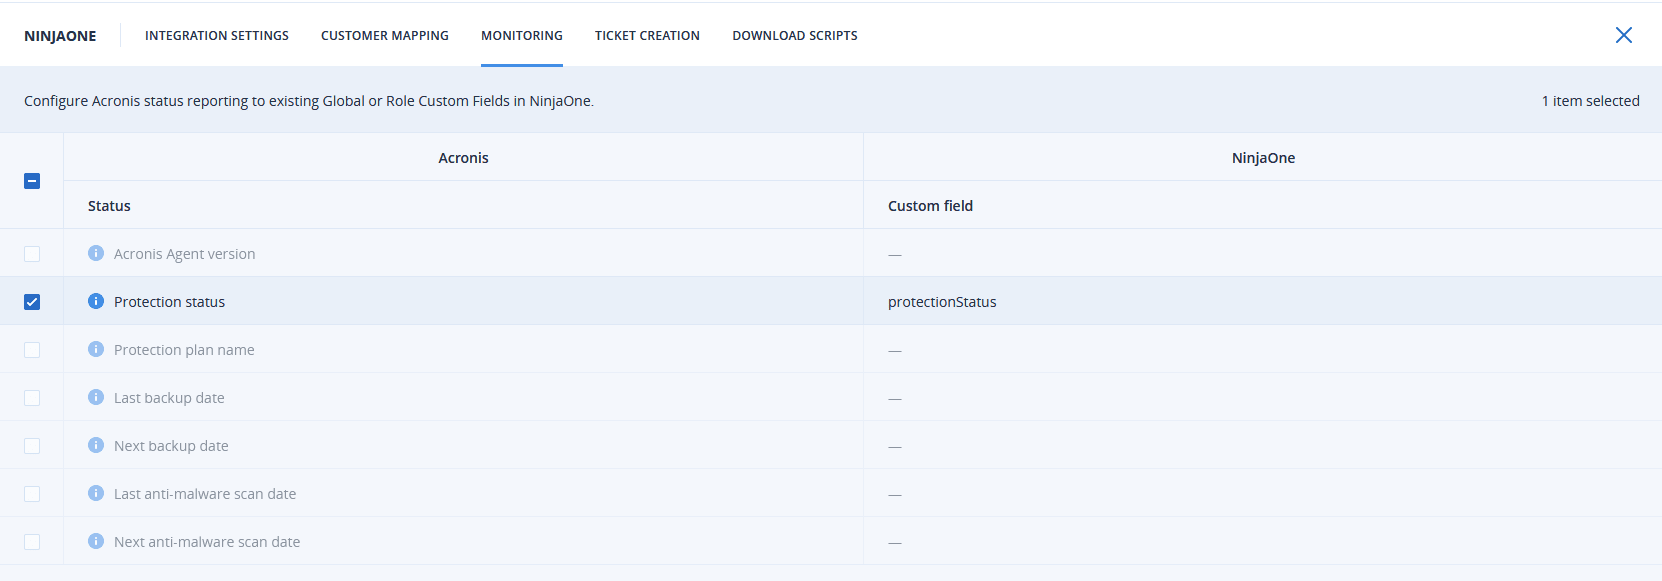 .
. - Map statuses of your choice to custom fields in NinjaOne by selecting a value from the drop-down list in the Custom field column. The custom fields are available for selection only if the API permissions for them are set to Read/Write and if they are of types, applicable for the selected status:
- Text for Statuses: "Acronis Agent version", "Protection status", "Protection plan name"
- Date/Time for Statuses: "Last backup date", "Next backup date", "Last anti-malware scan date", "Next anti-malware scan date"
See more information about managing custom fields in NinjaOne.
- Click Apply to keep these changes.
- If mapping was successful, you will see such notification in the lower right corner.
As a result, for every mapped workload under each mapped customer tenant in NinjaOne, the respective statuses will be updated to the selected custom fields.
To create new custom fields:
- Go to NinjaOne > Administration > Devices > Role Custom Fields/Global Custom Fields.
- Select either Role or Global custom field.
- Create one or more new custom fields of your own.
See also View device status.
Configure ticketing
Ticket creation is a functionality that configures which alerts, raised in Acronis, to have corresponding tickets, created in NinjaOne. All standard Acronis alerts can be synced except for the ones, configured in the Monitoring plans of the Advanced Management pack.
Ticket synchronization
Ticket synchronization translates Acronis Cyber Cloud alerts into NinjaOne tickets. Alerts are synced with created tickets in both directions every 10-15 mins for all mapped customers. You can select alert types, configure creating and auto-closing rules, as well as assign priority, status and other ticket parameters.
Ticketing creation configuration
- Go to the Ticket creation tab and enable the feature if it was not before (it can also be enabled from Integration settings).
- Select the Ticket form from the drop-down list of available values. Forms are defined in NinjaOne and only those without obligatory fields can be selected for automatic ticket creation.
- Select alert types, which have to be synced as tickets to NinjaOne.
- For each alert type, define the parameters to be used for ticket creation in NinjaOne:
- Severity
- Status
- Priority
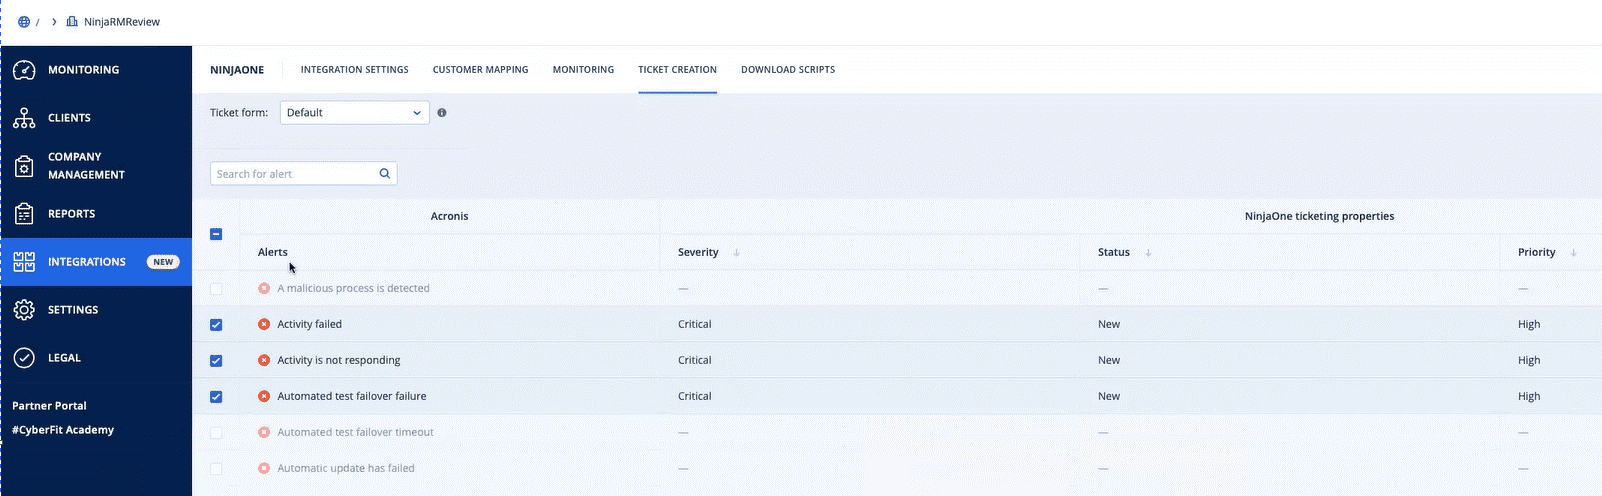
- Click Apply to keep these settings.
After the ticketing feature is enabled, the required alert types are selected and ticketing parameters for them are configured. Tickets will be automatically created and synced for all mapped customers.
Resolving tickets in NinjaOne
In this scenario, the integration can resolve a linked ticket in NinjaOne when the originating Acronis alert has been already cleared.
By default, this option is disabled. To turn it on:
- Go to the Integration settings tab.
- Locate the Tickets section and open it for editing.
- Enable the Automatically resolve ticket option.
- Use the Status drop-down list to select the desired value for setting the ticket to resolved state.
Reopening tickets in NinjaOne
In this scenario, the integration can reopen an already resolved ticket within a specified period of time after the resolution.
By default, this option is disabled. To turn it on:
- Go to the Integration settings tab.
- Locate the Tickets section and open it for editing.
- Enable the Automatically reopen ticket option.
- In the Days numeric field, set maximum number of days that should have passed after closing the ticket and before the integration creates a new one.

In this case, the integration will not create a new ticket for the alert, but rather reopen the closed one. If the number of days passed since the original ticket has been resolved are more than the number configured in the option above, then a new ticket will be created.
Clearing alerts in Acronis
In this scenario, the integration can clear an originating Acronis alert by detecting if linked NinjaOne ticket has been resolved.
By default, this option is disabled. To turn it on:
- Go to the Integration settings tab.
- Locate the Tickets section and open it for editing.
- Enable the Automatically clear alert option.
- Use the Status drop-down list to select a value for the ticket status to clear the Acronis alert.
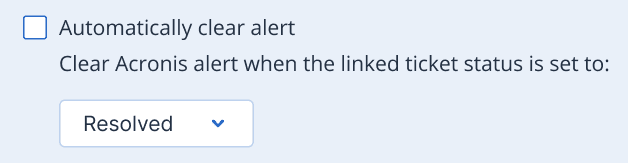
In this case, the integration will clear the originating Acronis alert.
Download scripts
-
Go to the Download scripts tab.
-
Download the integration scripts packages:
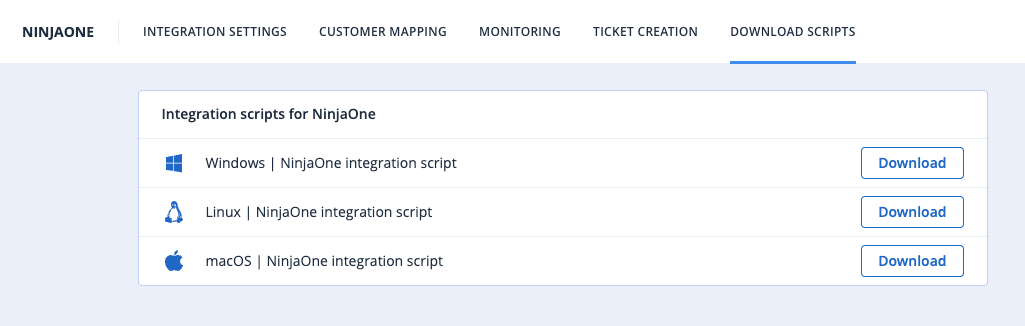
These packages are required in order to proceed with the setup in NinjaOne.