Obtaining application ID and application secret
To use the modern authentication for Office 365, you need to create a custom application in the Entra admin center and grant it specific API permissions. Thus, you will obtain the application ID, application secret, and directory (tenant) ID that you need to enter in the Cyber Protect console.
To create an application in Entra admin center
- Log in to the Entra admin center as an administrator.
- Navigate to Azure Active Directory > App registrations, and then click New registration.
- Specify a name for your custom application, for example, Cyber Protection.
- In Supported Account types, select Accounts in this organizational directory only.
- Click Register.
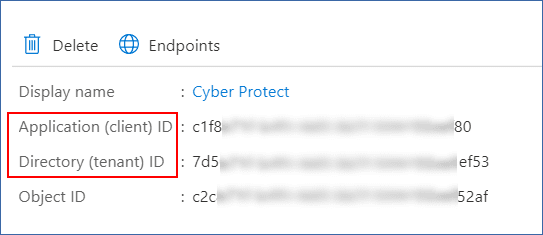
Your application is now created. In the Entra admin center, navigate to the application's Overview page and check your application (client) ID and directory (tenant) ID.

For more information on how to create an application in the Entra admin center, refer to the Microsoft documentation.
To grant your application the necessary API permissions
- In the Entra admin center, navigate to the application's API permissions, and then click Add a permission.
- Select the APIs my organization uses tab, and then search for Office 365 Exchange Online.
- Click Office 365 Exchange Online, and then click Application permissions.
- Select the full_access_as_app check box, and then click Add permissions.
- In API permissions, click Add a permission.
- Select Microsoft Graph.
- Select Application permissions.
- Expand the Directory tab, and then select the Directory.Read.All check box. Click Add permissions.
- Check all permissions, and then click Grant admin consent for <your application's name>.
- Confirm your choice by clicking Yes.
To create an application secret
- In the Entra admin center, navigate to your application's Certificates & secrets > New client secret.
- In the dialog box that opens, select Expires: Never, and then click Add.
- Check your application secret in the Value field and make sure that you remember it.

For more information on the application secret, refer to the Microsoft documentation.