Creating a personal Google Cloud project
To add your Google Workspace organization to the Cyber Protection service by using a dedicated Google Cloud project, you need to do the following:
- Create a new Google Cloud project.
- Enable the required APIs for this project.
-
Configure the credentials for this project:
-
Configure the OAuth consent screen.
-
Create and configure the service account for the Cyber Protection service.
-
- Grant the new project access to your Google Workspace account.
To create a new Google Cloud project
- Sign in to the Google Cloud Platform (console.cloud.google.com) as a Super Administrator.
-
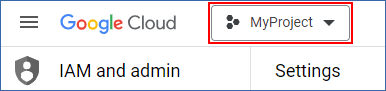
In the Google Cloud Platform console, click the project picker in the upper-left corner.
-
In the screen that opens, select an organization, and then click New project.

- Specify a name for your new project.
- Click Create.
As a result, your new Google Cloud project is created.
To enable the required APIs for this project
- In the Google Cloud Platform console, select your new project.
- From the navigation menu, select APIs and services > Enabled APIs and services.
-
Disable all the APIs that are enabled by default in this project, one by one:
-
Scroll down the Enabled APIs and services page, and then click the name of an enabled API.
The API/Service details page of the selected API opens. - Click Disable API, and then confirm your choice by clicking Disable.
-
[If prompted] Confirm your choice by clicking Confirm.
-
Go back to APIs and services > Enabled APIs and services, and disable the next API.
-
- From the navigation menu, select APIs and services > Library.
-
In the API library, enable the following APIs, one by one:
-
Admin SDK API
-
Gmail API
-
Google Calendar API
-
Google Drive API
-
Google People API
Use the search bar to find the required APIs. To enable an API, click its name, and then click Enable. To search for the next API, go back to the API library, by selecting APIs and services > Library from the navigation menu.
-
To configure the OAuth consent screen
- From the navigation menu in the Google Cloud Platform, select APIs and services > OAuth consent screen.
- In the window that opens, select Internal for user type, and then click Create.
- In the App name field, specify a name for your application.
- In the User support email field, enter the Super Administrator email.
- In the Developer contact information field, enter the Super Administrator email.
- Leave all other fields blank, and then click Save and continue.
- On the Scopes page, click Save and continue, without changing anything.
- On the Summary page, verify your settings, and then click Back to dashboard.
To create and configure the service account for the Cyber Protection service
- From the navigation menu in the Google Cloud Platform, select IAM & Admin > Service accounts.
- Click Create service account.
- Specify a name for the service account.
-
Specify a description for the service account.
- Click Create and continue.
- Do not change anything in the Grant this service account access to the project and Grant users access to this service account steps.
-
Click Done.
The Service accounts page opens.
- On the Service accounts page, select the new service account, and then under Actions, click Manage keys.
- Under Keys, click Add key > Create new key, and then select the JSON key type.
-
Click Create.
As a result, a JSON file with the private key of the service account is automatically downloaded to your machine. Store this file securely because you need it to add your Google Workspace organization to the Cyber Protection service.
To grant the new project access to your Google Workspace account
- From the navigation menu in the Google Cloud Platform, select IAM & Admin > Service Accounts.
- In the list, find the service account that you created, and then copy the client ID that is shown in the OAuth 2.0 Client ID column.
- Sign in to the Google Admin console (admin.google.com) as a Super Administrator.
- From the navigation menu, select Security > Access and data control > API controls.
- Scroll down the API controls page, and then under Domain-wide delegation, click Manage domain-wide delegation.
The Domain-wide delegation page opens. -
On the Domain-wide delegation page, click Add new.
The Add a new client ID window opens.
- In the Client ID field, enter the client ID of your service account client.
-
In the OAuth scopes field, copy and paste the following comma-delimited list of scopes:
https://mail.google.com,https://www.googleapis.com/auth/contacts,https://www.googleapis.com/auth/calendar,https://www.googleapis.com/auth/admin.directory.user.readonly,https://www.googleapis.com/auth/admin.directory.domain.readonly,https://www.googleapis.com/auth/drive,https://www.googleapis.com/auth/gmail.modify
Alternatively, you can add the scopes one per line:
- https://mail.google.com
- https://www.googleapis.com/auth/contacts
- https://www.googleapis.com/auth/calendar
- https://www.googleapis.com/auth/admin.directory.user.readonly
- https://www.googleapis.com/auth/admin.directory.domain.readonly
- https://www.googleapis.com/auth/drive
- https://www.googleapis.com/auth/gmail.modify
-
Click Authorise.
As a result, your new Google Cloud project can access the data in your Google Workspace account. To back up the data, you need to link this project to the Cyber Protection service. For more information on how to do this, refer to To add a Google Workspace organization by using a dedicated personal Google Cloud project.
If you need to revoke the access of your Google Cloud project to your Google Workspace account, and respectively the access of the Cyber Protection service, delete the API client that your project uses.
To revoke access to your Google Workspace account
-
In the Google Admin console (admin.google.com), sign in as a Super Administrator.
-
From the navigation menu, select Security > Access and data control > API controls.
-
Scroll down the API controls page, and then under Domain-wide delegation, click Manage domain-wide delegation.
The Domain-wide delegation page opens. -
On the Domain-wide delegation page, select the API client that your project uses, and then click Delete.
As a result, your Google Cloud project and the Cyber Protection service will not be able to access your Google Workspace account and back up the data in it.