Linux-based bootable media
To create a Linux-based bootable media
- Start the Bootable Media Builder.
-
To create a full-featured bootable media, specify an Acronis Cyber Protect license key. This key is used to determine which features will be included in the bootable media. No licenses will be revoked from any machines.
If you don't specify a license key, the resulting bootable media can only be used for recovery operations.
-
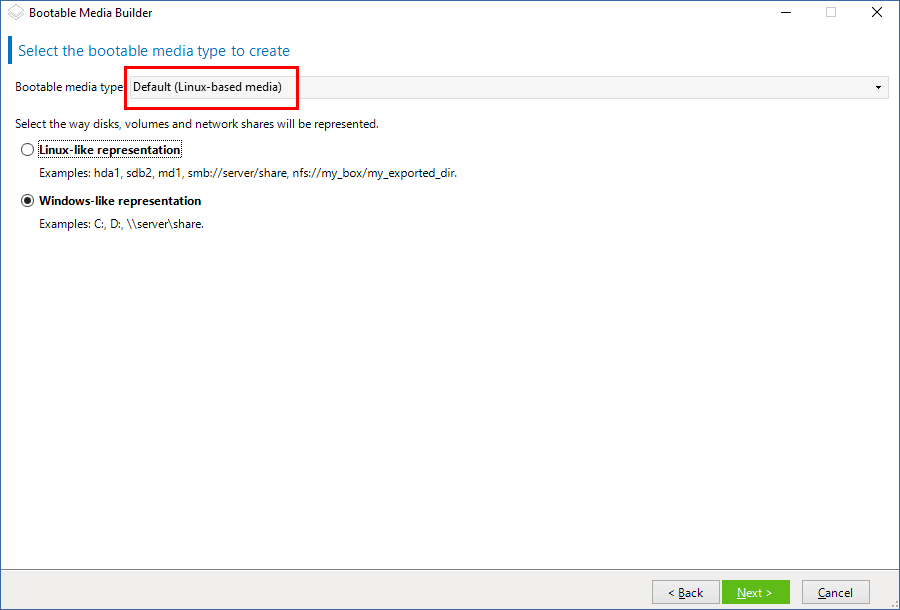
Select Bootable media type: Default (Linux-based media).
Select how volumes and network resources will be represented:
- A media with Linux-like volume representation displays the volumes as, for example, hda1 and sdb2. It tries to reconstruct MD devices and logical (LVM) volumes before starting a recovery.
- A media with Windows-like volume representation displays the volumes as, for example, C: and D:. It provides access to dynamic (LDM) volumes.
-
[Optional] Specify the parameters of the Linux kernel. Separate multiple parameters with spaces.
For example, to be able to select a display mode for the bootable agent each time the media starts, type: vga=ask
- [Optional] Select a language that will be used in the bootable media.
-
Select the components to be placed on the media: the Acronis Cyber Protect bootable agent, and/or Universal Restore if you plan to restore the system on dissimilar hardware.
The bootable agent allows you to perform backup, recovery, and disk management operations on any PC-compatible hardware, including bare metal.
Universal Restore allows you to boot an operating system recovered to dissimilar hardware or to a virtual machine. The tool finds and installs drivers for devices that are critical for starting the operating system, such as storage controllers, motherboard, or chipset.
-
[Optional] Specify the timeout interval for the boot menu, along with the component that will automatically start on timeout. To do so, click the desired component on the upper left pane, and then set the interval for it. This enables unattended onsite operation when booting from WDS/RIS.
If this setting is not configured, the loader will wait for you to select whether to boot the operating system (if present) or the component.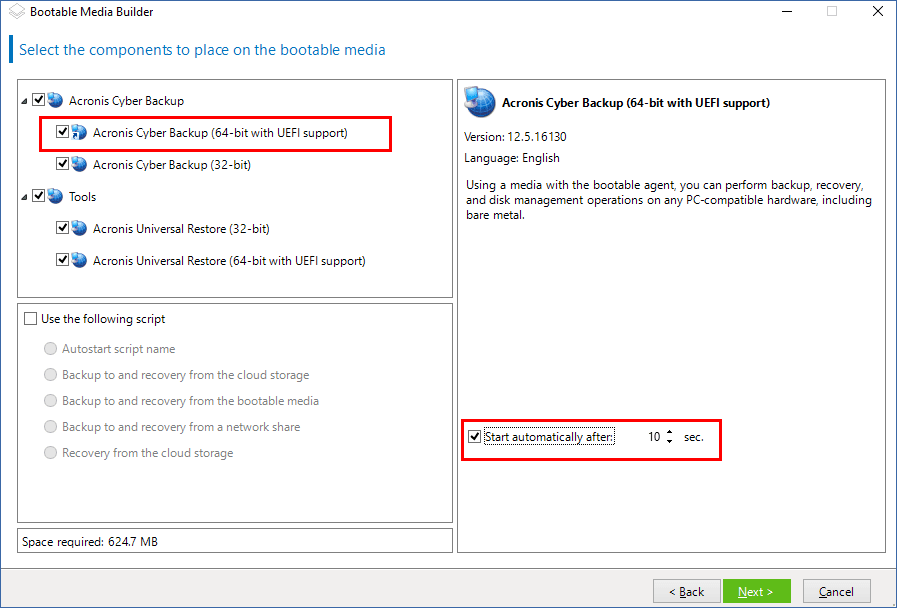
- [Optional] If you want to automate the bootable agent operations, select the Use the following script check box.
-
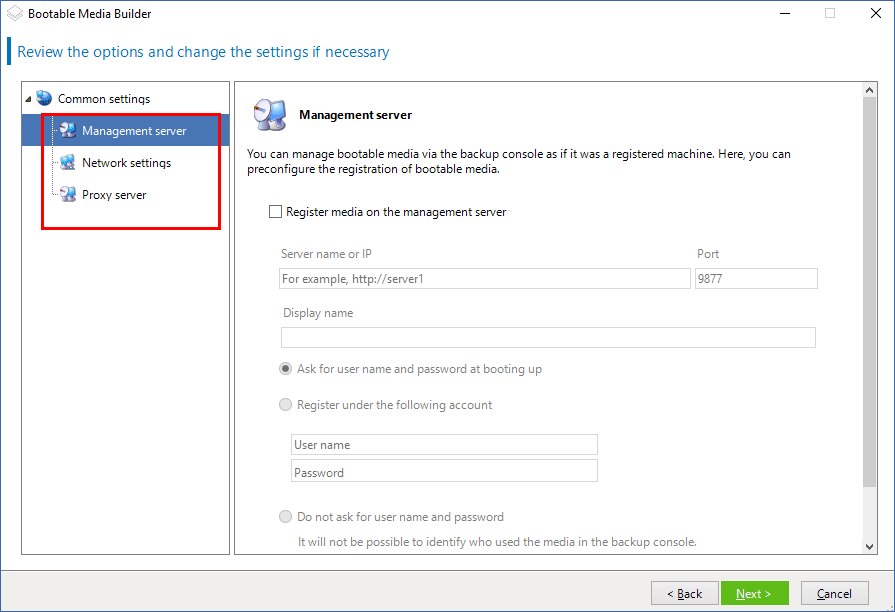
[Optional] Select how to register the media on the management server on booting up. For more information about the registration settings, see Management server.
- [Optional] Specify network settings: TCP/IP settings to be assigned to the machine network adapters.
- [Optional] Specify a network port: The TCP port on which the bootable agent listens for an incoming connection.
- [Optional] If a proxy server is enabled in your network, specify its host name/IP address and port.
-
Select the type of media. You can:
- Create an ISO image. Then you can burn it to a CD/DVD; use it to create a bootable USB flash drive; or connect it to a virtual machine.
- Create a ZIP file.
- Upload the selected components to Acronis PXE Server.
- Upload the selected components to a WDS/RIS.
- [Optional] Add Windows system drivers to be used by Universal Restore. This window appears if Universal Restore is added to media and media other than WDS/RIS is selected.
- If prompted, specify the host name/IP address and credentials for WDS/RIS, or a path to the media ISO file.
- Check your settings in the summary screen, and then click Proceed.