Before you start, we recommend that you read general information about Disk cloning utility.
To clone a disk:
On the sidebar, click Tools, and then click Clone disk.
On the Clone Mode step, choose a transfer mode.
Automatic—Recommended in most cases.
Manual—Manual mode will provide more data transfer flexibility. Manual mode can be useful if you need to change the disk partition layout.
If the program finds two disks, one partitioned and another unpartitioned, it will automatically recognize the partitioned disk as the source disk and the unpartitioned disk as the destination disk. In such case, the next steps will be bypassed and you will be taken to the cloning Summary screen.
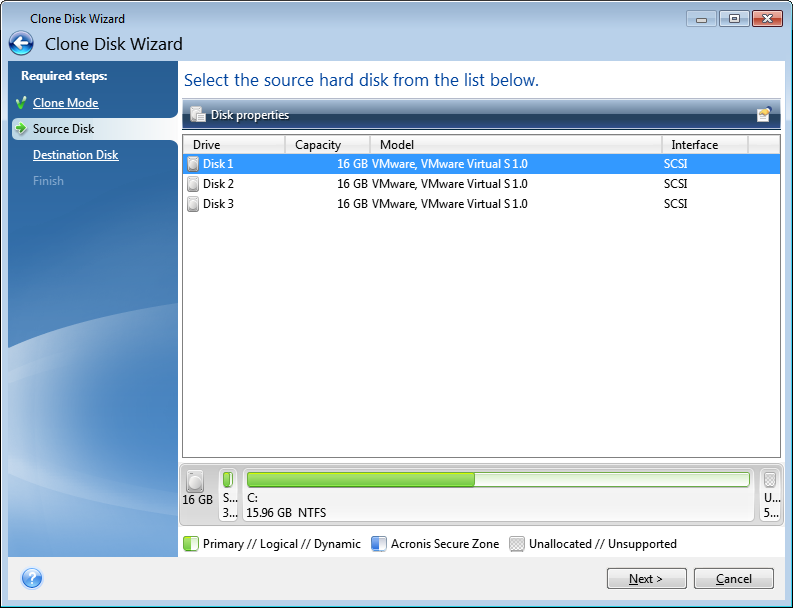
On the Source Disk step, select the disk that you want to clone.
Acronis True Image 2015 does not support cloning of dynamic disks.
On the Destination Disk step, select the destination disk for the cloned data.
If the selected destination disk contains partitions, you will need to confirm deletion of the partitions. Note that the real data destruction will be performed only when you click Proceed on the last step of the wizard.
If any disk is unpartitioned, the program will automatically recognize it as the destination and bypass this step.
[This step is only available in the manual cloning mode]. On the Move method step, choose a data move method.
As is—a new partition will be created for every old one with the same size and type, file system and label. The unused space will become unallocated.
Proportional—the new disk space will be proportionally distributed between cloned partitions.
Manual—you will specify a new size and other parameters yourself.
[This step is only available in the manual cloning mode]. On the Change disk layout step, you can edit settings of the partitions that will be created on the destination disk. Refer to Manual partitioning for details.
[Optional step] On the What to exclude step, you can specify files and folders that you do not want to clone. Refer to Excluding items from cloning for details.
On the Finish step, ensure that the configured settings suit your needs, and then click Proceed.
If the cloning operation is stopped for some reason, you will have to configure and start the procedure again. You will not lose your data, because Acronis True Image does not alter the original disk and data stored on it during cloning.
Cloning a disk containing the currently active operating system will require a reboot. In that case, after clicking Proceed, you will be asked to confirm the reboot. Canceling the reboot will cancel the entire procedure. By default, Acronis True Image 2015 shuts down the computer after the clone process finishes. This enables you to change the position of master/subordinate jumpers and remove one of the hard drives.